

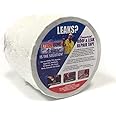
EternaBond H.B. Fuller RoofSeal White 6" x10' MicroSealant UV Stable Seam Repair Tape | 35 mil Total Thickness | EB-RW060-10R - One-Step Durable, Waterproof and Airtight Repair
Details
- BrandEternaBond
- ColorWhite
- MaterialEternabond
- Number of Items1
- Recommended Uses For ProductOutdoor


Description
🔧 Fix it fast, fix it right with EternaBond!
- UV STABLE - Designed to withstand the elements, ensuring long-lasting durability.
- SEAL IT ALL - Stop leaks in their tracks with a permanent, waterproof solution.
- QUICK EASY - Repair leaks in minutes with a simple one-step application.
- PROFESSIONAL CHOICE - Trusted by roof repair specialists for reliable performance.
- VERSATILE APPLICATION - Perfect for all roof types and surfaces, from metal to concrete.
EternaBond H.B. Fuller RoofSeal is a 6" x 10' MicroSealant tape that provides a durable, waterproof, and airtight repair solution. With a total thickness of 35 mil, it is designed for quick application on various surfaces, making it the go-to choice for professional roof repair specialists.
Specifications
| Manufacturer | Eternabond |
| Brand | EternaBond |
| Product Dimensions | 9.65 x 9.65 x 15.24 cm; 472 Grams |
| Item model number | 730604-11247 |
| Manufacturer Part Number | 730604-11247 |
| Special Features | Waterproof |
| Item Weight | 472 g |
Reviews
C**B
Wow impressive product!
I bought a used enclosed snowmobile trailer this winter. The roof was covered with snow but looked good from the inside. The first hint of a problem was the first time I washed the trailer. I noticed soap suds and water streaks running down the inside walls. I grabbed my ladder and the problem was evident immediately. The original silicone seam from the manufacturer had developed stress cracks over the course of 10 years. It was a nice wide silicone seal about an 1 1/2 wide and surprisingly thick.The previous owner had tried to reseal some of these areas with clear silicone and in other areas with what appeared to be some sort of epoxy resin. It may have worked for awhile but the end result was a failure. I would have loved to reapply a silicone bead to the seam but there was no way I could match how it came from the factory. I honestly have no idea how they got the bead of silicone to be so uniform and wide. My initial research led me to a product called dicor lap seal. I cleared one side of trailer of silicone with a razor blade initially and a wire brush attached to my drill to clean the rest. I purchased the dicor lap seal specifically because it was self-leveling. I was hoping I could apply a wide bead and it would self-level enough to approach the width of the original silicone seal. It was apparent after about an hour after the application that it was nowhere near the width or thickness of the original seal. The lap seal worked well and it was free from leaks on that side of the trailer but I could tell it wasn't going to last that way for long. I needed something wide to bridge the gap between the upright walls of trailer and the roofline. I did some more research and that's when I found this product. I had enough faith in the product after reading some other reviews here and other sites that I removed all the new dicor lap seal with the same process as the silicone removal. I also removed all the other silicone from the trailer roof. I was a little nervous working with a new product that I had such high expectations from. I started with the back of trailer first because it was the shortest side. I started to enroll the tape in about two-foot sections and would remove the plastic backer along with it. I applied the tape evenly, first to the top of the upright wall, and the remaining onto the trailer roof. I would press lightly at first to make sure the tape was where I wanted it. I could remove the tape and reapply with great effort if I had to at this time, which I did do several times throughout the entire project. Once I was satisfied with the placement, I rolled the tape with the Eternabond 2 pound roller that I had purchased too. This process was quite simple and the bond afterward was impressive to say the least. I tried to pull a section of the tape off after rolling it just to see how well it adhered. The closest example I can think of that you may be able to relate to is trying to remove a piece of embedded gum from carpet. This stuff sticks end of story! When I got to the end of the roof I took a scissors and cut the tape off evenly. I overlapped the tape on the ends rather than butt them for what I considered a better waterproof seal. It has rained quite a few times with a few thunderstorms in the mix and thus far no leaks whatsoever.The next test will be to see how it fairs over the winter months. I will try to do an update next spring to see if any leaks occur. There is one thing I would have done differently. I should have purchased the 4" wide tape. It wasn't that much more money and it would have given me an extra two inches of waterproof sealing power. I was concerned the 4" tape would be too hard to work with but I would have been fine. I will be keeping this product on hand. I liked working with it that much and I can use it on a variety of things.
R**N
Cold weather application
This is an excellent product to use to seal your rv rubber roof. Ensure the surface temperature is warm when you apply the tape as the product adheres far better than in a hotter environment. I went out in the morning and sprayed the cleaner which was fine but when I sprayed the activator on the cool roof, it did not create that sticky surface. I put the tape down and unfortunately one small area did not adhere. Please do not blame the product, it was my error in trying to apply on a cool surface and this review is to prevent others from making the same mistake.
B**S
So far seems great
I had a leak issue where my RV roof met the siding. I decided to go this route and cover from the roof, over the termination bar, and onto the metal siding. I spent a lot of time cleaning the roof and siding before install, but when I did install it went very well. I was warned that once it sticks it is very hard to remove, and it seems to be true. I used a hard roller to make sure it was adhered correctly, and so far it looks great and seems to be doing its job right. I may caulk over the edges in the spring, but I’m confident it will hold back my leak for winter snow load on the roof during storage.
A**R
Easy to apply, adheres very well, looks as good as the day Inapplied it 2 seasons ago
Very easy to applyAdheres very wellPerforms as well as I hoped for
S**K
Wow impressive product!
I bought a used enclosed snowmobile trailer this winter. The roof was covered with snow but looked good from the inside. The first hint of a problem was the first time I washed the trailer. I noticed soap suds and water streaks running down the inside walls. I grabbed my ladder and the problem was evident immediately. The original silicone seam from the manufacturer had developed stress cracks over the course of 10 years. It was a nice wide silicone seal about an 1 1/2 wide and surprisingly thick. The previous owner had tried to reseal some of these areas with clear silicone and in other areas with what appeared to be some sort of epoxy resin. It may have worked for awhile but the end result was a failure. I would have loved to reapply a silicone bead to the seam but there was no way I could match how it came from the factory. I honestly have no idea how they got the bead of silicone to be so uniform and wide. My initial research led me to a product called dicor lap seal. I cleared one side of trailer of silicone with a razor blade initially and a wire brush attached to my drill to clean the rest. I purchased the dicor lap seal specifically because it was self leveling. I was hoping I could apply a wide bead and it would self level enough to approach the width of the original silicone seal. It was apparent after about an hour after the application that it was no where near the width or thickness of the original seal. The lap seal worked well and it was free from leaks on that side of the trailer but I could tell it wasn't going to last that way for long. I needed something wide to bridge the gap between the upright walls of trailer and the roofline. I did some more research and that's when I found this product. I had enough faith in the product after reading some other reviews here and other sites that I removed all the new dicor lap seal with the same process as the silicone removal. I also removed all the other silicone from the trailer roof. I was a little nervous working with a new product that I had such high expectations from. I started with the back of trailer first because it was the shortest side. I started to enroll the tape in about two foot sections and would remove the plastic backer along with it. I applied the tape evenly, first to the top of the upright wall, and the remaining onto the trailer roof. I would press lightly at first to make sure the tape was where I wanted it. I could remove the tape and reapply with great effort if I had to at this time, which I did do several times throughout the entire project. Once I was satisfied with the placement I rolled the tape with the Eternabond 2 pound roller that I had purchased too. This process was quite simple and the bond afterward was impressive to say the least. I tried to pull a section of the tape off after rolling it just to see how well it adhered. The closest example I can think of that you maybe able to relate to is trying to remove a piece of embedded gum from carpet. This stuff sticks end of story! When I got to the end of the roof I took a scissors and cut the tape off evenly. I overlapped the tape on the ends rather than butt them for what I considered a better waterproof seal. It has rained quite a few times with a few thunderstorms in the mix and thus far no leaks whatsoever. The next test will be to see how it fairs over the winter months. I will try to do an update next spring to see if any leaks occur. There is one thing I would have done differently. I should have purchased the 4" wide tape. It wasn't that much more money and it would have given me an extra two inches of waterproof sealing power. I was concerned the 4" tape would be too hard to work with but I would have been fine. I will be keeping this product on hand. I liked working with it that much and I can use it on a variety of things.
Common Questions
Trustpilot
2 weeks ago
2 days ago
